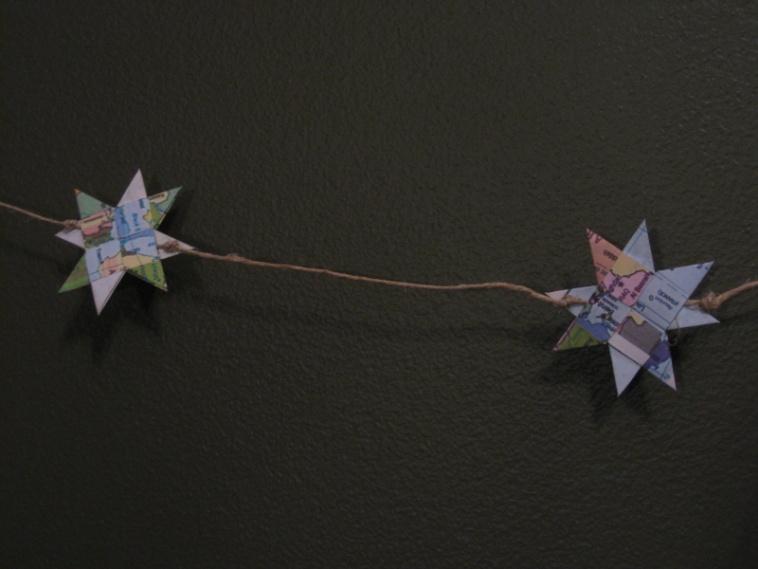
In this week’s theme of fundraiser ideas, here is a tutorial on how to make woven paper star garland. In honor of adoption, I printed a map (which you can find free printable ones all over pinterest) on both sides of printer paper and that is what I used to make the stars. Although, in order to teach you how to make the star, I used different colored strips of paper so it is less confusing. Here’s an example of what my woven map star garland turned out like.

What you need: paper (I used normal printer paper, but you can use just about anything), scissors, a ruler, pencil and hemp or string.
- Cut 4 strips of paper a ½ inch by 11 inches. Fold the strips in half with the end of each strip at an angle (1).

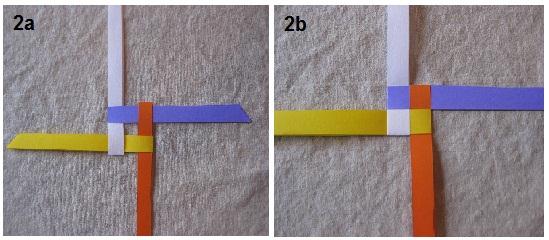
- Insert strips into one another like the picture show below (2a). Pull them together tight (2b).
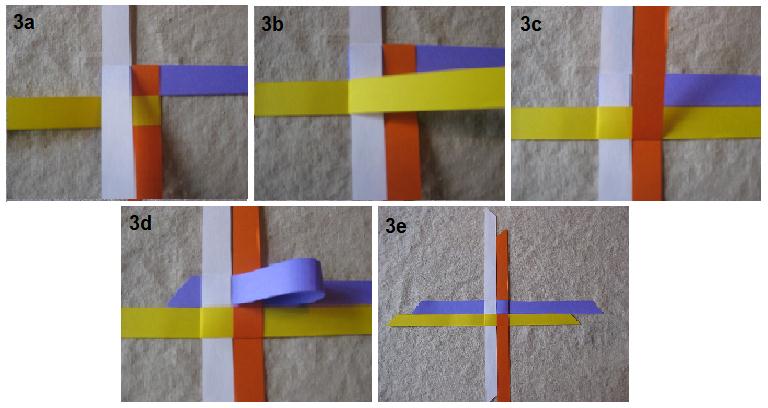
- Fold down the top part of the white strip (3a). Fold the top part of the yellow strip to the right (3b). Fold the top part of the orange strip up (3c). Fold the top part of the blue strip to the left. Then insert the end point through the loop under the white strip (3d). It will then look like this (3e).
- Take the bottom left white strip and turn it under and fold it 90° towards the left (4a). Fold the white strip 90° upwards so it looks like this (4b). Fold the same white strip in half lengthwise (4c). It will now look like a small triangle at the bottom. For now, tuck the small triangle under so it’s not in the way. Now take the white strip and insert it through the yellow loop that is underneath it (4d). When this step is done it will look like this (4e).

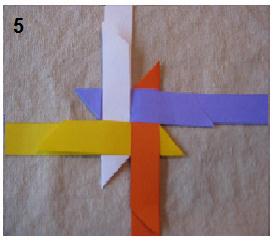
- Turn your star to the right and follow step 4 again for the yellow strip. After you complete step 4 repeat it again for the two next remaining colors. It will look like this when it is done (5).
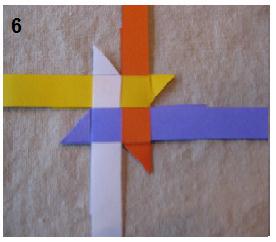
- Turn the star completely over (6).
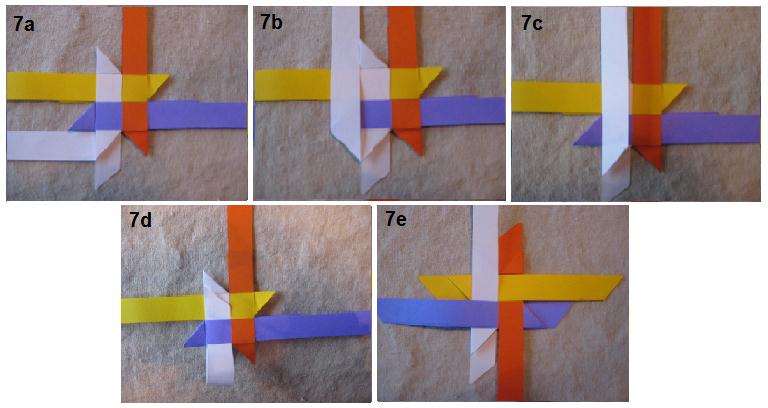
- This step will look very similar to step 4. First you will take the bottom left white strip and turn it under and fold it 90° towards the left (7a). Fold the white strip 90° upwards so it looks like this (7b). Fold the same white strip in half lengthwise (7c). Tuck the small triangle under so it’s not in the way. Now take the white strip and insert it through the blue loop that is underneath it (7d). When this step is done it will look like this (7e). Continue doing this to each side.
- Then take the white strip and crease it over the white triangle underneath it (8a). Then cut off the strip right below the top of the triangle crease (8b). Then fold the top strip under itself a little below the line that you just creased. Then tuck the little triangle you just made into the triangle that is already a part of the star (8c). This is what it will look like once it is finished (8d). Do this to all of the strips that are sticking out on that side. When that side is done it will look like this (8e).

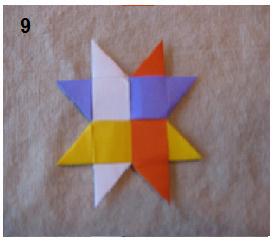
- Turn the star over and repeat step 8 to that whole side. When you are done it will look like this (9).
- Thread the hemp under the loops diagonally. Knot it on boths sides of the star so that the star does not move. It will look like this at the end (10).
Once you get this down and do it a few times, making these stars take less time and less time. Plus you can include your family in on the fun! You can use this garland for just about anything you can think of! It’s just complicated enough that you could sell them for a fundraiser, but not so complicated that you won’t want to make them for your own home!
For more information about MLJ Adoptions’ international adoption programs, please click here.